Introduction
Laravel Cloud applications can be made up of many environments, such as “production”, “staging”, or even short-lived environments used for trialing new features you’re developing for your application. Compute infrastructure, resources, and deployment settings are unique to each environment, allowing you to fine-tune each environment based on its purpose. For example, you might wish to assign small Flex compute instances that scale to zero to your staging environment, while larger, always-on compute instances are assigned to your production environment.Build and deploy commands
You may define how both the frontend and backend of your application are built during deployment from the “Deployments” section of your environment settings.Build commands
Build commands allow you to customize the build process for your application. Typically, this will involve customizing how you want Composer and NPM dependencies to be installed. In addition, you may add any custom build scripts or commands that are specific to your Laravel application.Private Composer packages
To allow the installation of private Composer packages, you will need to configure your application’s Composer HTTP authentication credentials for each package using thecomposer config command. You should add this command to your build commands prior to invoking composer install:
Dynamic environment variables
Deploy commands
Your environment’s “Deploy Commands” are run on your Laravel Cloud infrastructure just before a new deployment goes “live”. Typically, these commands will be used to migrate your environment’s database. Unlike build commands, changes made to the filesystem by deploy commands will not be persisted to your application.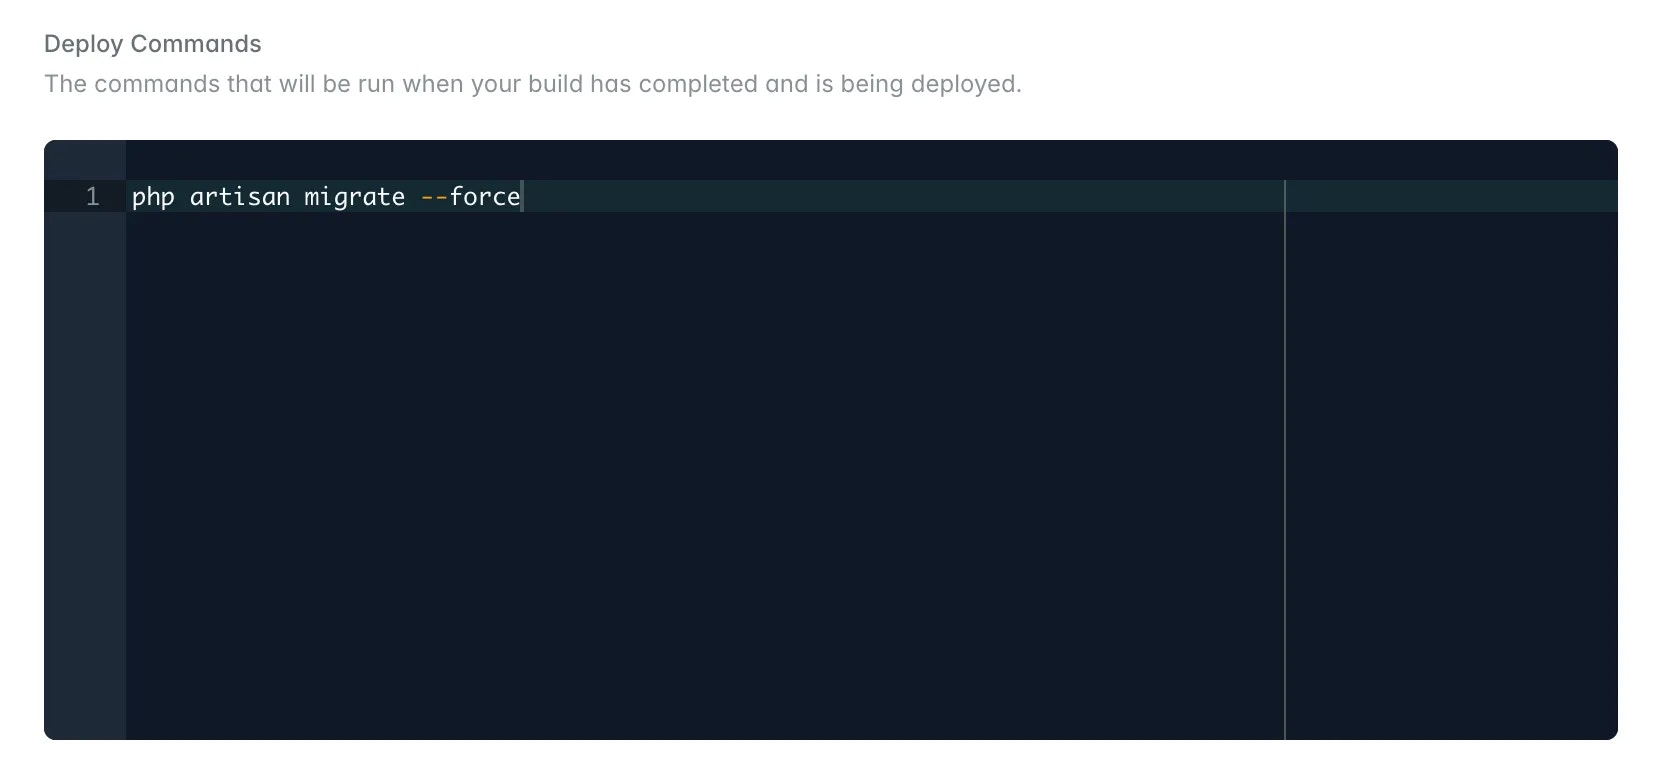
Unnecessary build and deploy commands
The following commands are either automatically handled by Laravel Cloud or should not be run during deployment:php artisan queue:restart- Queue workers are automatically restarted after each deploymentphp artisan horizon:terminate- Horizon processes are automatically managed during deploymentsphp artisan optimize:clear- This clears the cache and can cause unexpected behavior, especially related to the queuephp artisan storage:link- The symbolic link won’t persist as changes made during deploy commands are not saved. Use Laravel Object Storage for persistent file storage instead.
Environment settings
Environment variables
Within your environment’s settings, the environment variables section allows you to customize the.env variables available to your environment.
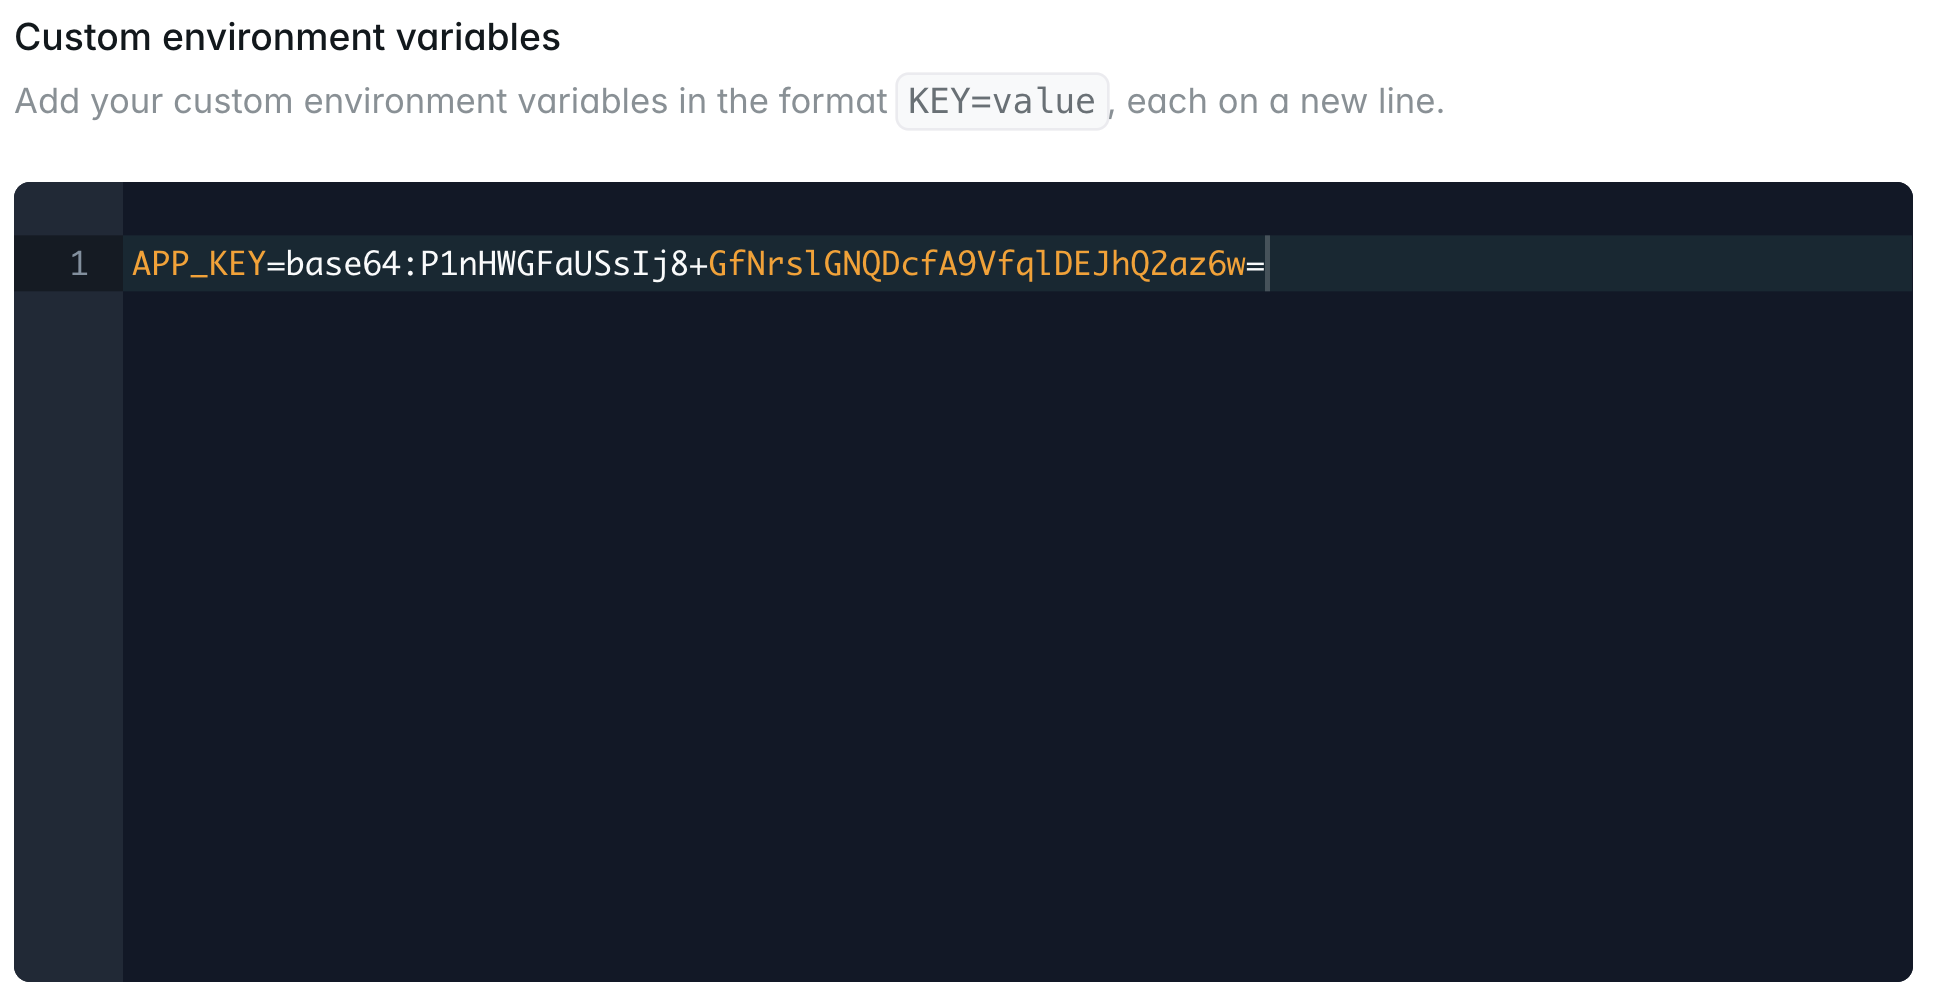
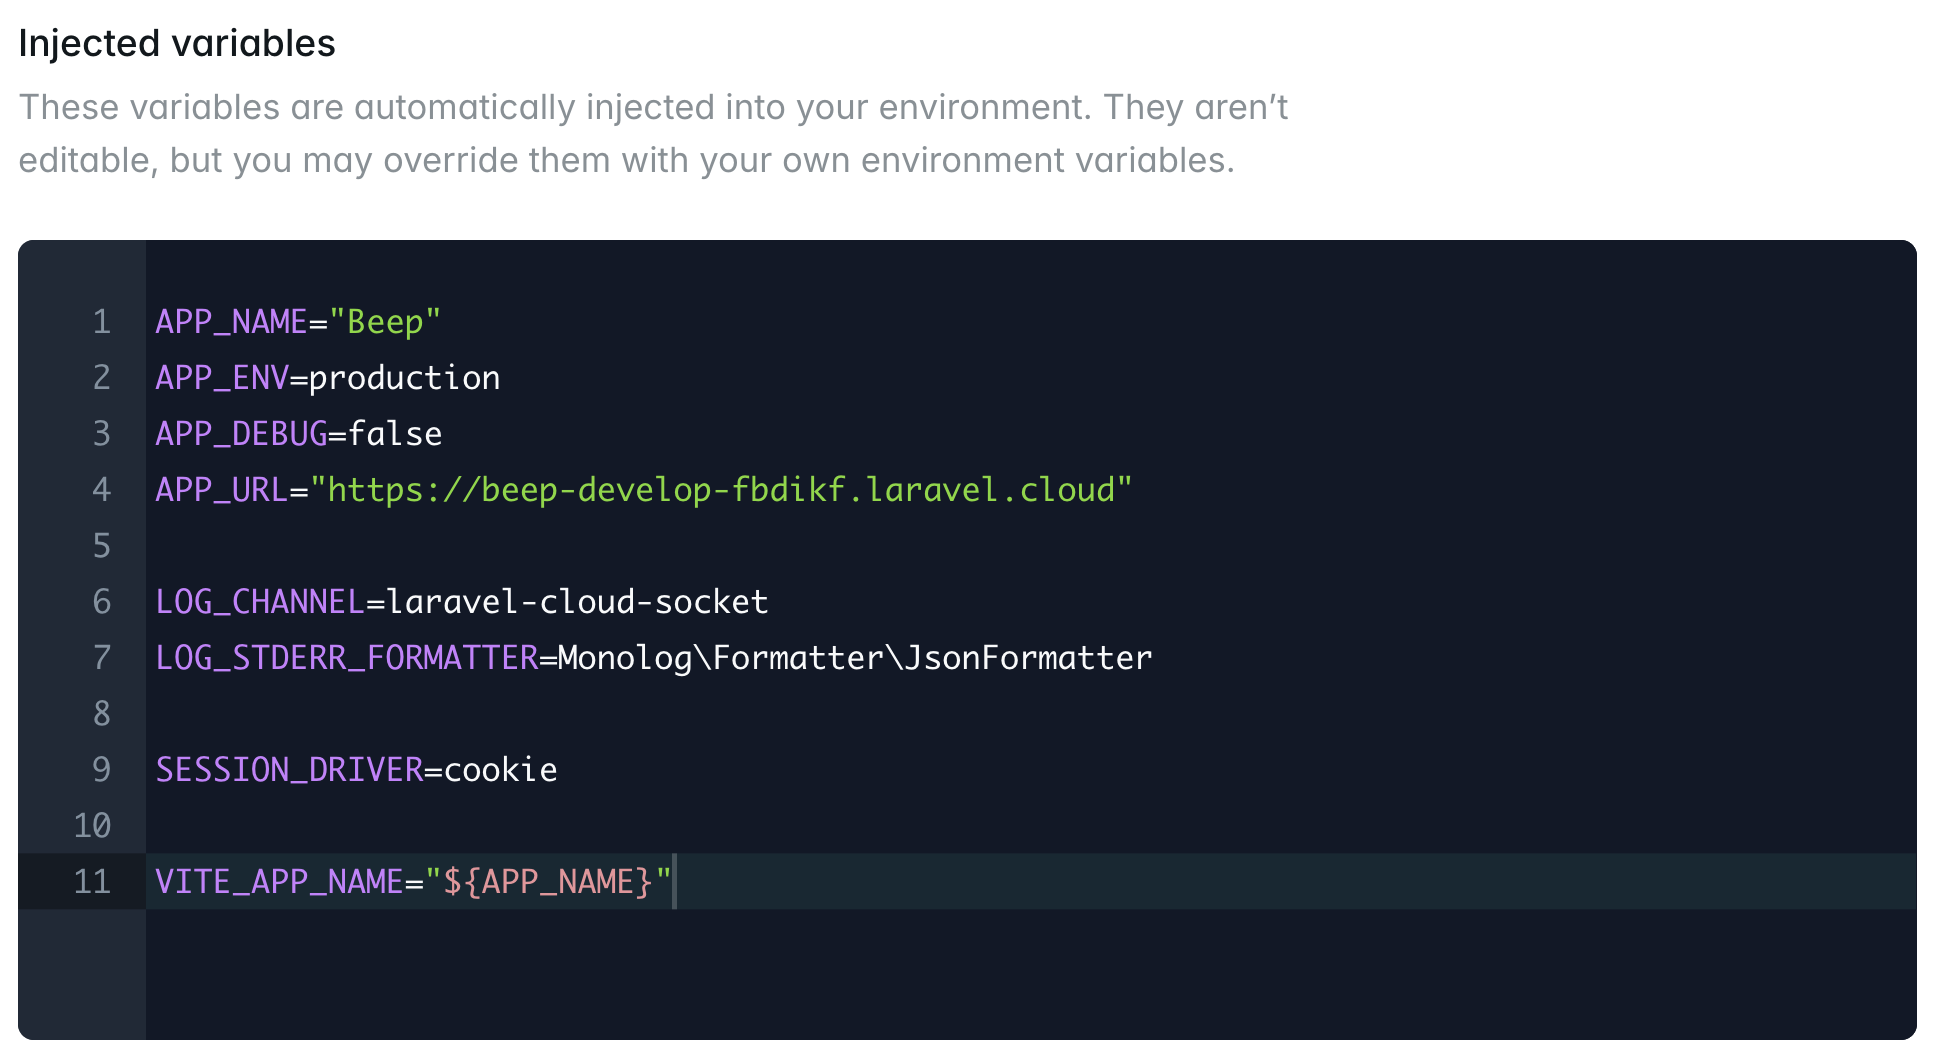
Custom environment variables take priority and will override any automatically injected environment variables.
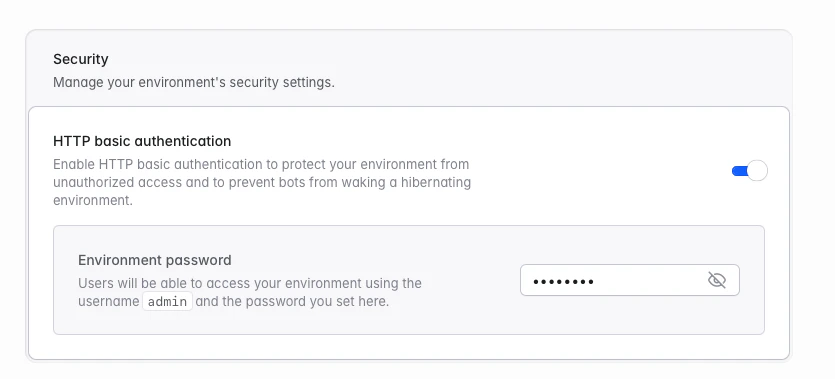
HTTP basic authentication
HTTP basic authentication allows you to protect an environment with a username and password before traffic reaches your application. This is useful for staging environments, private demos, preview environments, or sleeping environments that should not wake up because of unauthorized requests or automated bot traffic. You may enable HTTP basic authentication from your environment’s General Settings page in the Security section. When enabled, users can access the environment using the usernameadmin and the password you set. Passwords must be between 5 and 32 characters and cannot contain the : character.
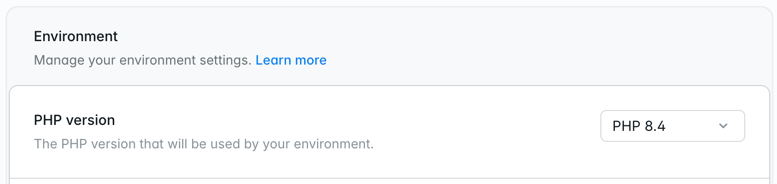
PHP version
Laravel Cloud supports PHP 8.2, 8.3, 8.4, and 8.5. PHP 8.5 is the default selection for new environments. You may select the PHP version that should be used by an environment on the environment’s General Settings page. After changing the PHP version, a re-deployment is required in order for the changes to take effect.PHP 8.5 is generally available, but the pdo_sqlsrv extension is temporarily unavailable until the upstream project adds 8.5 support. Use PHP 8.2, 8.3, or 8.4 if you need those extensions today.
PHP extensions
Laravel Cloud currently supports the following PHP extensions:php -m using Laravel Cloud’s “Command” feature in your environment dashboard.
PHP memory limit
Laravel Cloud allocates PHP memory dynamically based on a percentage of your instance’s total memory. If your application requires a specific amount, you can override this by defining a newmemory_limit.
You can override the default memory limit by adding configuration directly in your application code. The most common method is to update your public/index.php and your artisan file:
Node version
From your environment’s General Settings page, you may select the Node version that should be available to the build commands used to build your application during a deployment. Node 24 is the default for new environments, and you can switch between Node 20, Node 22, and Node 24 at any time. After changing the Node version, a re-deployment is required in order for the changes to take effect.
Cloud domains
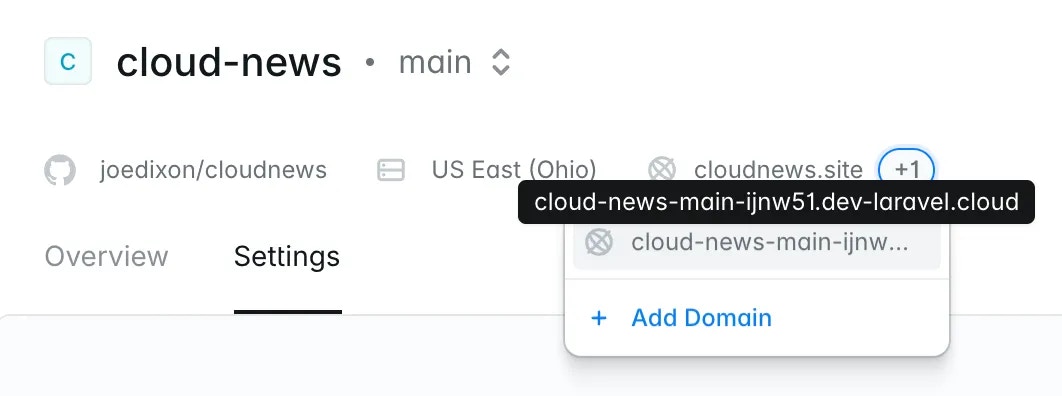
Each Laravel Cloud environment is assigned a freelaravel.cloud domain the first time it is deployed successfully. This makes it easy to test and build your application before attaching a custom domain.
Laravel Cloud domains are constructed using a combination of your application and environment name. If either of these names are changed, the Laravel Cloud domain will be updated to reflect the changes. A redeployment is required for this change to take effect.
Custom domains
Of course, before shipping your application to the world, you will likely want to assign your own custom domain name to your production environment. Laravel Cloud will guide you through DNS configuration, verify domain ownership, and issue an SSL certificate automatically. For comprehensive documentation (DNS records, verification paths, wildcards, provider-specific guides, and plan limits), see Domains.Stop and restart
To stop an environment, click the ”…” button next to the environment’s “Deploy” button. Then, click “Stop”. When you stop an environment, all App and Worker clusters within the environment will be shutdown. This means all web traffic, background processes, and scheduled tasks will stop processing. You will not be charged for the environment’s compute, but you will still be charged for any attached resources. You can restart the environment using the same dropdown menu. A full deployment is required to restart an environment.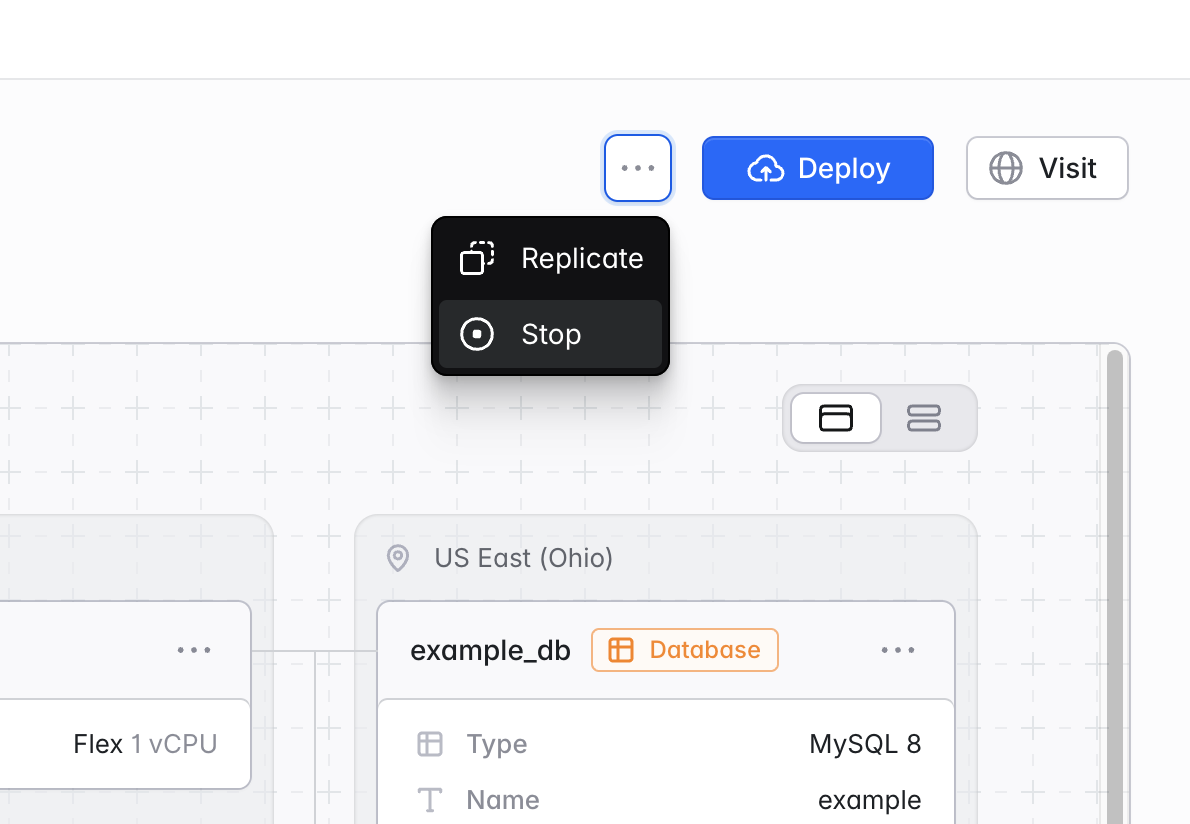
Replicate
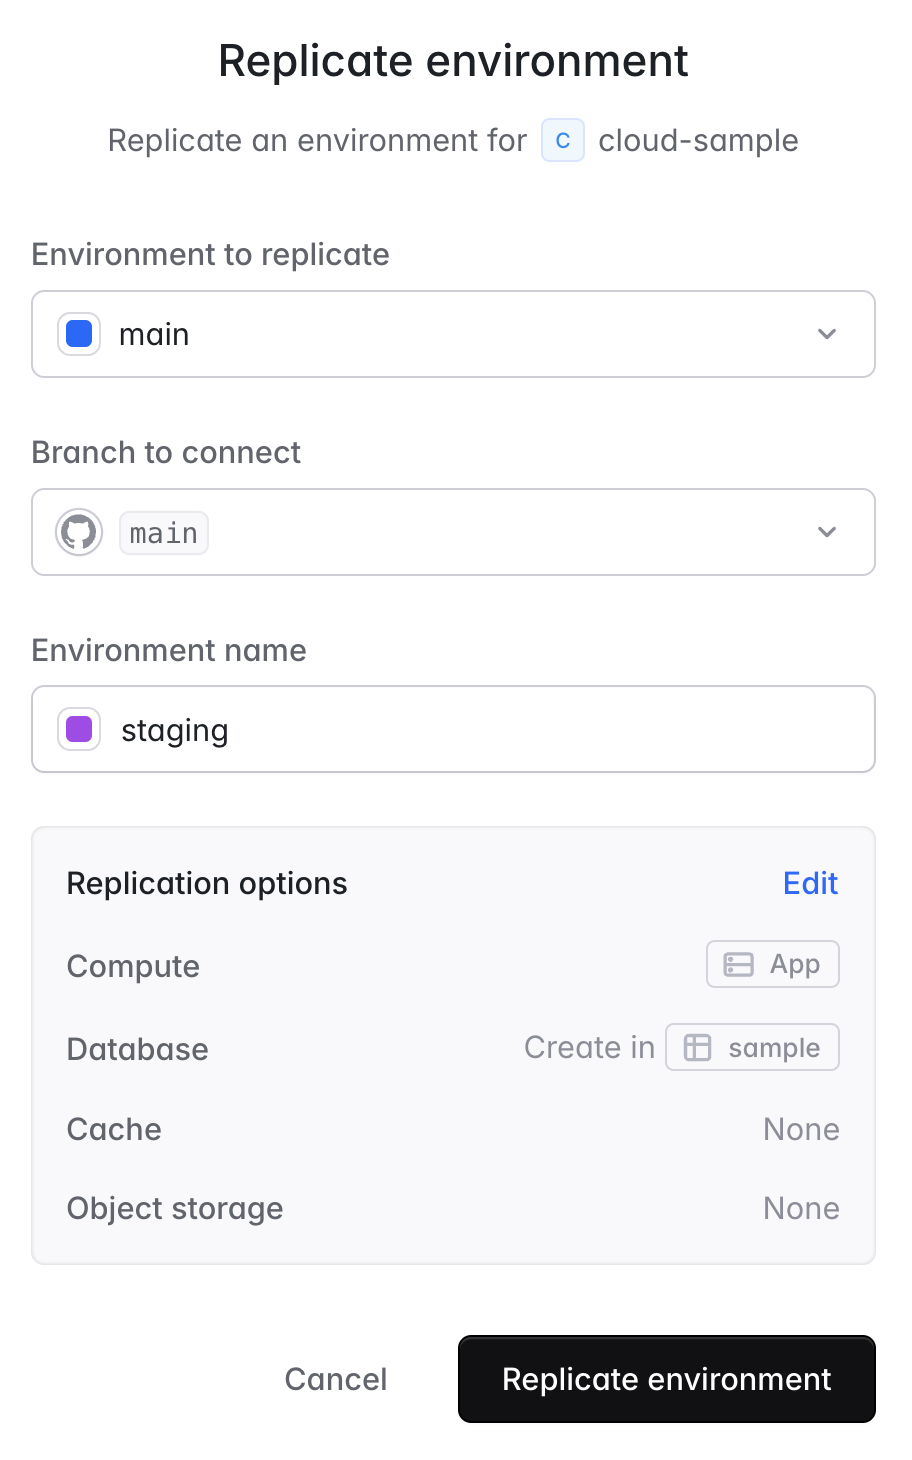
It is common for environments in the same application to have similar or identical resource and settings configurations. Therefore, when creating new environments, it is often more convenient to clone an existing environment and make changes rather than creating a new environment from scratch. To replicate an environment, click the ”…” button next to the environment’s “Deploy” button. Then, click “Replicate”. Confirm you are replicating the correct environment and Git branch, then enter a name for your new environment. By default, all General, Environment, and Deployment settings will be duplicated. You can optionally edit the default replication settings for compute and resources. The default replication behavior is:- Compute: duplicate all clusters (including size, autoscaling, scale to zero, scheduler, Octane, Inertia, and background process settings)
- Database: use the same database compute / storage cluster, but create a new logical database schema
- Cache: use the same KV Store instance, but add a unique
CACHE_PREFIXenvironment variable to your application - Object storage: no replication
Commands
Laravel Cloud allows you to execute commands directly in your environment. Navigate to your environment’s “Commands” tab to run one-time commands such asphp artisan cache:clear.
Commands will be executed on any available instance in your environment.
Filesystem
Environment filesystems are ephemeral, meaning files may not persist across requests or jobs. New deployments or re-deployments will reset the filesystem. In addition, each replica of your compute cluster has its own filesystem. Thus, you should treat the filesystem as temporary, unshared disk space that is only consistent during a single request or job. The total disk space available on each replica is proportional to the compute / RAM of the cluster. Every 1GB of RAM is equal to 512MB of disk space. For example, a cluster with 2GB of RAM will have 1GB of ephemeral disk space available to it. If you exceed the available disk space, your application may crash and the deployment may need to restart. We recommend usingredis or database drivers for a persistent cache and session via a KV Store or database resource. For persistent file storage, use the s3 driver via Laravel Object Storage.
Nightwatch integration
Laravel Cloud environments have built-in support for Laravel Nightwatch monitoring. Nightwatch provides deep insights into your application environment’s performance, exceptions, logs, and overall health.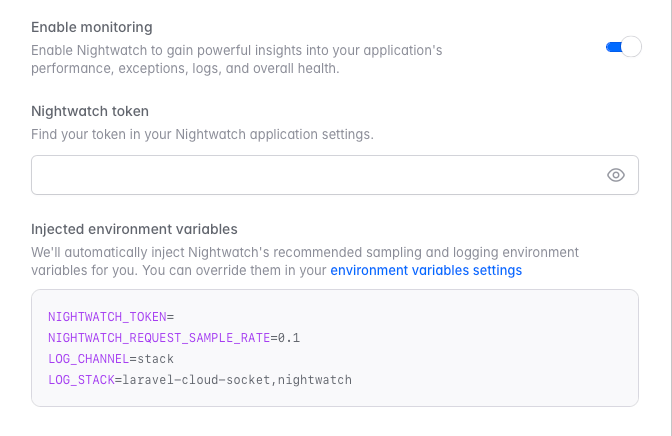
Install Nightwatch package
Install the Laravel Nightwatch package in your application locally using Composer:
Run
composer require laravel/nightwatch on your local machine to update your composer.json and composer.lock files before deploying.Enabling Nightwatch will automatically run the agent across all the App compute and Worker clusters in the environment. You can setup Nightwatch manually if you want the agent to run on specific instances.